Advanced Timber Frame Dehumidification for Auckland Builders
Unrivaled Dehumidification Solutions
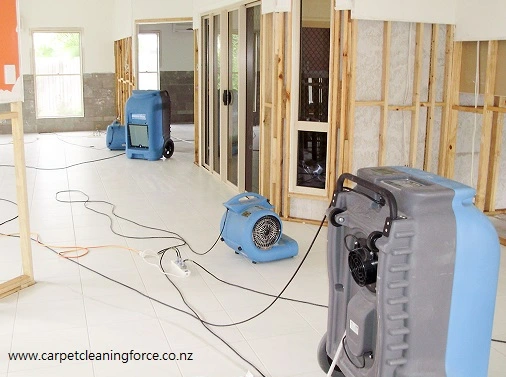
Timber framing during New Zealand’s winter can be tricky. In Auckland, humidity regulations pose unique challenges, leading to potential damage, cost overruns, and project delays. Our innovative dehumidification service changes the game, making winter construction more efficient.
Pricing Details
- Air Dryer Fan, 850 Watt: $35 per night (plus GST)
- Dehumidifier Hire, 90 Liter, 1300 Watt: $75 per night (plus GST)
Depending on the house’s size, it takes 2 to 3 days to lower the moisture content below the necessary level for building code compliance.
Let’s Talk Wood! Click the chat icon now. 🗨️
Compare Timber Frame Drying Process –
Dryer Fan with Dehumidifier VS. Diesel Fan Heater
| Feature | Dryer Fan with Dehumidifier | Diesel Fan Heater |
|---|---|---|
| Operation | It uses electricity to power a fan that circulates air and a dehumidifier that removes moisture. | It uses diesel fuel to power a fan and produce heat that dries the air. |
| Cost of Running | Relatively lower running costs as it uses electricity. It may vary depending on electricity rates. | Higher running costs due to the cost of diesel fuel. |
| Drying Time | Removing a large amount of moisture from the air can dry timber relatively quickly. | It can dry timber quickly by heating the air and increasing its capacity to hold moisture. |
| Environmental Impact | Lower environmental impact as it does not produce carbon emissions during operation. | Higher environmental impact due to carbon emissions from burning diesel. |
| Moisture Control | More control over moisture levels as the dehumidifier can be set to a desired humidity level. | Less control over moisture levels as it relies on heating the air to increase its moisture-holding capacity. |
| Risk of Over-Drying/Cracking | There is a lower risk of over-drying or cracking the timber as moisture levels are more controlled. | There is a higher risk of over-drying or cracking the timber due to less control over moisture levels. |
| Energy Efficiency | Generally more energy-efficient as it uses electricity. | Less energy-efficient due to the combustion of diesel fuel. |
| Maintenance | Regular maintenance is required for the dehumidifier to ensure optimal performance. | Regular maintenance is required for the diesel engine and fan heater. |
| Suitability for Enclosed Spaces | Suitable for enclosed spaces as it does not produce carbon emissions. | Not suitable for enclosed spaces without proper ventilation due to carbon emissions. |
| Effect on Timber Quality | Generally, it produces higher-quality timber with less risk of over-drying or cracking. | This may result in lower-quality timber due to the higher risk of over-drying or cracking. |
Why Choose Our Dehumidification System?
Powerful Equipment at Its Best
- Premium industrial dehumidifiers, fans, and ventilators.
- Capable of extracting 90 liters of moisture in a day.
- Engineered for Auckland’s climate, ensuring timber remains undistorted.
Quick and Efficient Service
- Moisture levels meet code compliance within 48 to 72 hours.
- Rapid service for timely pre-line inspections.
Got Wood Worries? Let’s chat about it. Click the chat icon now. 😊
Kiln Seasoning of Timber
Introduction to Kiln Seasoning
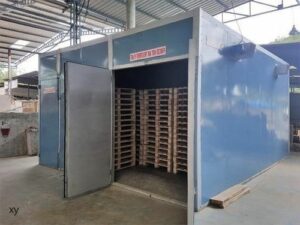
Kiln seasoning is one of the most common and effective methods for drying timber. It involves placing the timber inside a kiln, a special type of oven designed to dry wood, and controlling the temperature, humidity, and air circulation to speed up the water evaporation process from the wood.
The Process of Kiln Seasoning
The kiln seasoning process involves several steps:
- Preparation: Before the timber is placed in the kiln, it is usually sorted and stacked properly to ensure even air circulation around each piece.
- Loading: The prepared timber is then loaded into the kiln.
- Drying: The kiln is then operated at a specific temperature and humidity level, which varies depending on the type of wood and the desired moisture content. The kiln’s fans circulate the hot air around the timber, removing the moisture.
- Cooling: Once the timber reaches the desired moisture content, the kiln temperature is gradually reduced to allow the wood to cool down before being removed from the kiln.
- Conditioning: Sometimes, the timber might undergo a conditioning phase to relieve any stresses developed during drying.
Advantages of Kiln Seasoning
- Speed: Kiln seasoning is much faster than air seasoning. It can take only a few days to a few weeks to dry the timber, depending on the species and thickness of the wood.
- Control: The kiln operator has complete control over the temperature, humidity, and air circulation, which results in more uniform drying and a higher quality product.
- Less Defects: Kiln seasoning reduces the chances of defects such as warping, cracking, and staining, common in air-dried timber.
- Pest Control: The high temperatures in the kiln can kill any pests, fungi, or insects in the timber.
Disadvantages of Kiln Seasoning
- Cost: The main disadvantage of kiln seasoning is the cost. The initial investment for a kiln and the operating costs (energy) can be high.
- Skill Required: It requires skilled operators to manage the kiln and monitor the timber during drying.
Air Seasoning Drying in Timber Drying Shed
Introduction to Air Seasoning
- Air Seasoning: One of the oldest and most common methods of drying timber. It is a natural process that involves stacking the wood in a well-ventilated area and allowing the moisture to evaporate over time.
- Energy Requirement: This method uses no external energy except the energy required to stack the timber.
- Goal: Reduce the moisture content of the wood to a level suitable for its intended use.
The Timber Drying Shed
- Timber Drying Shed: A structure designed to facilitate the air drying process. It usually has a roofed system with open sides for good air circulation.
- Protection: The shed protects the timber from direct sunlight and rain, which can cause the wood to dry too quickly or unevenly.
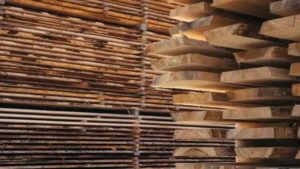
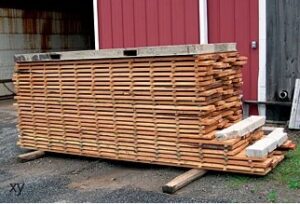
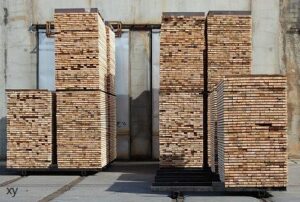
- Stacking on Stickers: The timber is usually stacked on stickers (small pieces of wood) to allow air to circulate all timber surfaces.
Stacking the Timber
- Proper Stacking: Crucial for effective air seasoning. The timber should be stacked to allow air to circulate all wood surfaces.
- Use of Stickers: Stickers are placed between the layers of timber to create spaces for air circulation. They should be of uniform thickness and placed directly above one another to ensure even drying.
- Level Stacking: The timber should be stacked so it is level and does not sag or twist during drying.
Duration of Air Seasoning
- Variability: The duration of the air seasoning process varies depending on several factors, such as the wood species, the initial moisture content, the thickness of the timber, and the climate.
- Typical Duration: The timber can take several months to a year or more to reach the desired moisture content. For example, 1-inch thick oak timber typically takes about one year to air dry in a temperate climate.
Advantages and Disadvantages of Air Seasoning
- Advantages:
- It is a cost-effective method as it requires no energy input except for the energy needed to stack the timber.
- Produces timber with good dimensional stability.
- There is less risk of surface checks and cracks compared to kiln drying.
- Disadvantages:
- Takes a long time.
- The timber is exposed to the risk of fungal and insect attacks during the drying process.
- It is not suitable for all timber species and all climates.
Best Way to Dry Wood Slabs
Drying wood slabs properly is crucial for ensuring the quality and durability of the wood for its intended use. Incorrect drying can lead to problems such as warping, cracking, and fungal growth. Below are some methods and tips on the best way to dry wood slabs:
Air Drying
Air drying is one of the most common and economical methods for drying wood slabs.
- Stacking and Sticking: Stacking and sticking are essential for successful air drying. Stack the wood slabs flat on stickers, which are small pieces of wood that help air circulation and distribute the weight evenly.
- Cover and Elevate: Cover the top of the stack with a waterproof body and elevate the bottom to protect it from ground moisture.
- Choose the Right Location: The location where the wood is air-dried plays an important role. It should be a well-ventilated area but not too windy.
- Patience is Key: Air drying can take a long time, sometimes up to a year or more, depending on the thickness of the slabs and the local climate.
Kiln Drying
Kiln drying is a faster method than air drying but requires special equipment.
- Controlled Environment: Kiln drying offers a controlled environment where the temperature, humidity, and air circulation can be managed effectively.
- Prevent Cracks: To prevent the slabs from cracking, starting with a low temperature and increasing it gradually is important.
- Monitor Moisture Content: Regularly monitor the moisture content of the wood to avoid over-drying.
Tips for Drying Wood Slabs
- Seal the Ends: Sealing the ends of the wood slabs with a special wax or paint can help prevent end-grain checking (cracks).
- Use a Moisture Meter: Regularly check the moisture content of the wood with a moisture meter to ensure it is drying evenly.
- Avoid Direct Sunlight: Do not dry the wood slabs in direct sunlight as it can cause uneven drying and warping.
In conclusion, the best way to dry wood slabs largely depends on the available resources, time constraints, and the intended use of the wood. Air and kiln drying have advantages; choosing the best method that suits your needs is important. Proper stacking, sealing the ends, and regular monitoring of the moisture content are key factors in successfully drying wood slabs.
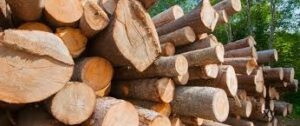
Drying Pine Logs
Drying pine logs is an essential step in the preparation of wood for use in construction, furniture making, and other applications. Proper drying is crucial to prevent the wood from warping, cracking, or developing mold. Here are some key considerations and methods for drying pine logs:
Methods of Drying
There are several methods of drying pine logs, each with its advantages and disadvantages:
- Air Drying: This is the most traditional and economical method. The pine logs are stacked with spacers in an open area where the air can circulate freely. This method is best suited for areas with low humidity and may take several months to complete.
- Kiln Drying: This is a faster method where the logs are placed in a kiln or a special drying chamber where the temperature and humidity are controlled. This method allows for precise control over the drying process and is suitable for large quantities of wood.
- Solar Kiln Drying: This is a variation of kiln drying where solar energy is used to heat the kiln. It is more economical and environmentally friendly than traditional kiln drying but may take longer.
Preparing the Logs
Before drying, the pine logs need to be prepared properly:
- Debarking: The bark is removed from the records as it can trap moisture and encourage the growth of mold and fungi.
- Sawing: The logs are sawn into the desired sizes. This will affect the drying time as smaller pieces of wood dry faster than larger ones.
- Stacking: The logs are stacked properly to allow air circulation. Spacers or stickers are placed between the layers to ensure even drying.
Monitoring the Drying Process
It is important to monitor the drying process carefully to ensure that the wood is drying evenly and to prevent defects:
- Checking the Moisture Content: The moisture content of the wood should be checked regularly using a moisture meter. The target moisture content will depend on the intended use of the wood.
- Preventing Defects: Care should be taken to avoid defects such as warping, cracking, or discoloration. This may involve rotating the logs, adjusting the temperature and humidity, or restacking the records.
Stacking Timber for Drying
Why Stacking is Important
Proper stacking of timber is a critical step in the drying process. It ensures:
- Uniform Drying: Properly stacked timber dries more uniformly, minimizing the risk of warping, bowing, or twisting.
- Air Circulation: Adequate air circulation around each piece of timber is essential for removing moisture.
- Minimized Defects: A reduction in drying defects such as checking and splitting.
Best Practices for Stacking Timber
- Use Spacers: Also known as stickers, these are thin pieces of wood placed between each layer of timber to ensure proper air circulation.
- Stack on a Flat Surface: This helps distribute the weight evenly and prevents the timber from warping.
- Align the Stack: Make sure the stack is aligned vertically to distribute the weight across the timber evenly.
- Protect from Elements: If air is drying outside, cover the top of the stack to protect it from rain and direct sunlight, but leave the sides open to allow air circulation.
Common Mistakes to Avoid
- Overloading: Stacking too much timber in one stack can cause the bottom layers to get compressed, leading to warping.
- Inadequate Spacing: Not using enough spacers or not placing them correctly can lead to uneven drying.
- Not Covering the Stack: If air drying outside, not covering the stack can lead to water damage and uneven drying.
Pro Tips for Timber Maintenance
- Elevate timber from a minimum of 100mm from the ground for straightness.
- Unload manually from delivery trucks.
- Shield timber from Auckland’s unpredictable weather.
- Eliminate water accumulation near timber bottom plates.
- Enclose frames swiftly to retain dryness.
- Dry immediately after moisture contact.
Benefits of Timber Frame Dehumidification
Superior Moisture Management
- Adhere to Auckland’s building code in record time.
- Preserve timber quality while drying interiors.
Optimized Construction Workflow
- Maintain project timelines and productivity.
- Counteract Auckland’s weather challenges efficiently.
Why Our Services Stand Out
- Extend timber lifespan and reduce damage costs.
- Enhance air quality and diminish mold risks.
- Environmentally conscious methods with zero harmful chemicals.
Timber Talk Time! Click the chat icon now. 🕒
Wouldn’t You Like To Chat? Click the icon! 😄
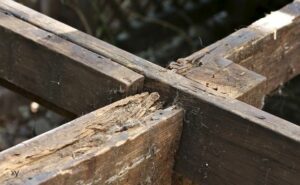
Rotten Timber Treatment
Identifying Rotten Timber
Before starting the treatment process, it’s essential to identify the areas of the timber that are rotten.
- Examine the wood: Rotten wood is usually soft, discolored, and may have a damp, musty smell.
- Use a screwdriver to probe the wood: If it feels soft and the screwdriver sinks into the wood easily, it’s a sign of rot.
Remove Rotten Timber
The first step in treating rotten timber is to remove the rotten parts.
- Use a chisel, screwdriver, or other suitable tool to remove the soft, rotten wood.
- Remove all the rotten parts until you reach solid, healthy wood.
Treat with Wood Hardener
Treat the affected area with a wood hardener once you remove all the rotten wood.
- Apply the wood hardener: This liquid penetrates the wood fibers and hardens to give the wood a solid surface. It also prepares the surface for filling. Apply the wood hardener according to the manufacturer’s instructions and allow it to dry completely.
Fill the Gap
After the wood hardener has dried, you need to fill the gap left by the rotten wood.
- Use a wood or epoxy filler: Apply the filler in layers until the gap is filled.
- Smooth the surface with a putty knife and allow the filler to dry completely.
Sand the Surface
Once the filler has dried, sand the surface until it is smooth and level with the surrounding wood.
- Start with coarse sandpaper and gradually move to finer grits for a smooth finish.
Paint or Varnish
The final step in treating rotten timber is to paint or varnish the surface.
- Apply a primer before painting: This will not only improve the appearance of the wood but will also act as a sealant to protect the wood from moisture and prevent future rot.
- Allow each coat to dry completely before applying the next one.
Payment Options:
Residential: Cash or online transfer post-service.
Commercial/Property Managers: Invoice for regular services or multiple properties.
